|
|
|
| 1. Create a New Checklist Form |
|
|
|
|
|
New Checklist Forms are built and maintained in the Configuration menu in RedTeam, and can be created or modified by any users with Permission to access this menu and Configuration option.
Checklists may be created and made available for all Projects within your database, or you can segment them by Customer, Project, etc. Checklist Forms may have several Sections and Items and even include additional options for each Item such as a place to enter a date, note, select from a dropdown, etc.
For assistance with your Checklist Forms, please submit a Help Me ticket via the Help Center.
|
|
|
Path:
|
|
Configuration menu > Requests for Correction > Checklist Forms
|
|
|
Steps:
|
|
•
|
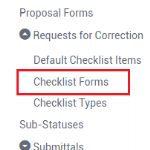
In the Configuration menu, under the Projects section, expand Requests for Correction and select Checklist Forms See Figure 1.
|
|
|
•
|
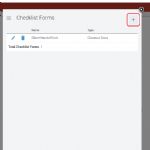
Click the New (+) icon to add a new Checklist Form See Figure 2.
|
|
|
•
|
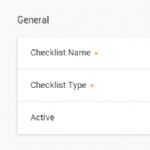
In the General section, enter a Name and select a Type for the Checklist See Figure 3.
|
|
|
•
|
In the Accessibility section, you may optionally segment the Checklist Form to be available for the Entire Company or a specific Company Division
|
|
|
•
|
In the Items section, begin building the Sections and Items to be included on this Checklist
|
|
|
•
|
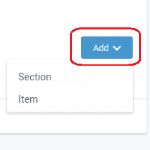
To add a new Section, click "Add" and select "Section" See Figure 4.
|
|
|
•
|
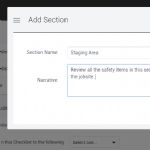
Enter a Section Name and optionally a Narrative (both will appear on the Checklist when the user fills it out on a Project) See Figure 5.
|
|
|
•
|
Click "Save" to return to the Add Checklist Form screen and continue adding Sections and Items
|
|
|
•
|
To add a new Item to a Section, click "Add" and select "Item"
|
|
|
•
|
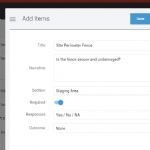
Enter a Title for the Item and optionally a Narrative (both will appear on the Checklist when a user fills it out on a Project) See Figure 6.
|
|
|
•
|
Select a section where the item will be grouped, the set of Responses, and an Outcome if desired
|
|
|
•
|
Outcomes are additional options that the user may use to enter additional info about the Item on the Checklist
|
|
|
•
|
When you are finished with the Item, click "Save" to return to the Add Checklist Form or "Save and New" to keep adding Items
|
|
|
•
|
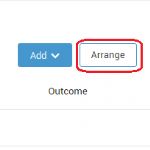
Click the Arrange button if you need to reorder any Items or Sections on the Checklist See Figure 7.
|
|
|
|
|
|
|
Figure 1,
"Checklist Forms" is located in the Projects section under Requests for Correction
|
|
|
Figure 2,
Click New
|
|
|
|
Figure 3,
If you do not have any Checklist Types, you may create them in Configuration > Checklist Types
|
|
|
|
|
Figure 3,
|
|
|
|
|
Figure 3,
|
|
|
|
Figure 4,
Click to add a new Section and then you can add Items
|
|
|
|
Figure 5,
Section Name is required but Narrative is optional
|
|
|
|
|
Figure 5,
|
|
|
|
|
Figure 5,
|
|
|
|
Figure 6,
Fill in all required fields designated by the orange asterisk
|
|
|
|
|
Figure 6,
|
|
|
|
|
Figure 6,
|
|
|
|
|
Figure 6,
|
|
|
|
Figure 7,
Click Arrange and drag & drop to reorder
|
|
|
|
|


